> ## Documentation Index
> Fetch the complete documentation index at: https://help.mercury360.com/llms.txt
> Use this file to discover all available pages before exploring further.
# Create a Job | Build and Publish Roles Faster
> Create jobs from scratch or with AI assistance, configure questionnaires and hiring pipelines, and publish to the right audience.
Creating a job is the entry point to every hiring workflow in Mercury Recruit. You can build one from scratch when you know exactly what you want, or use AI to generate a strong first draft.
Whichever method you choose, **always review the final job before publishing**. AI-generated content is a starting point, not a finished product.
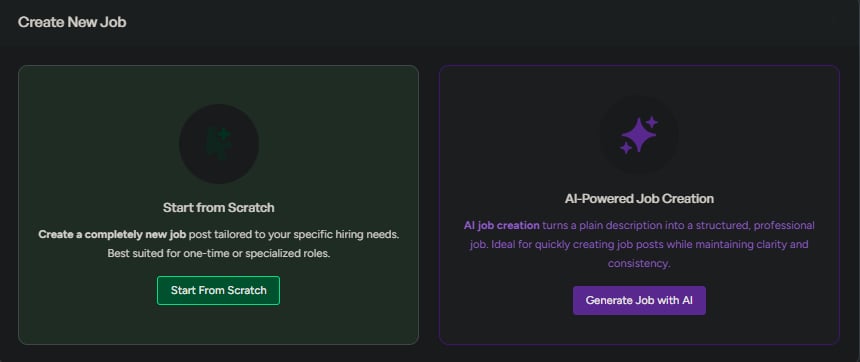
## Start creating a job
From the **Jobs** page, click **Create New Job** and choose how you want to start.
## Options
* **Start from scratch** — Best when you already know the job details and want full control over every field.
* **Generate with AI** — Best when you want to move faster or need help drafting job content.

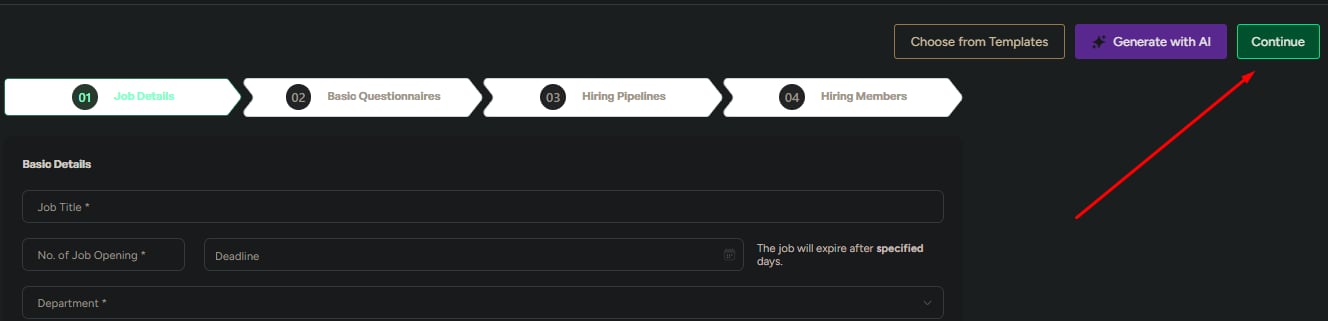
 ## Method 1 — Start from scratch
Use this when you have a clear job spec ready and want full control over the job setup.
Focus on the required fields first, then add supporting details.
| Priority | Fields |
| ------------- | ------------------------------------------------------------------------------------------------ |
| **Must fill** | Job title, number of openings, department, employment type |
| **Important** | Work type and location, job description |
| **Optional** | Deadline, industry and job function, position level, education, keywords, salary *(recommended)* |
Click **Continue**.
## Method 1 — Start from scratch
Use this when you have a clear job spec ready and want full control over the job setup.
Focus on the required fields first, then add supporting details.
| Priority | Fields |
| ------------- | ------------------------------------------------------------------------------------------------ |
| **Must fill** | Job title, number of openings, department, employment type |
| **Important** | Work type and location, job description |
| **Optional** | Deadline, industry and job function, position level, education, keywords, salary *(recommended)* |
Click **Continue**.
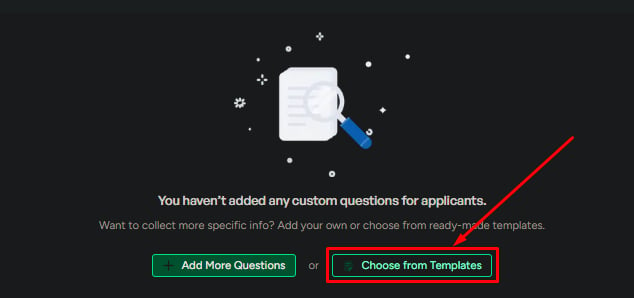
 Select a template or add custom screening questions.
Click **Continue**.
Select a template or add custom screening questions.
Click **Continue**.
 Load a pipeline template or build one from scratch. Add, edit, or remove stages to match your hiring process.
Click **Continue**.
Add workspace members who will work on this requisition.
Click **Continue**.
Verify every detail before publishing.
When ready, click **Publish** and choose:
* **Visibility** — Global (anyone can apply) or Confidential (restricted)
* **Timing** — Immediate or Scheduled
Then click **Publish Job**.
Load a pipeline template or build one from scratch. Add, edit, or remove stages to match your hiring process.
Click **Continue**.
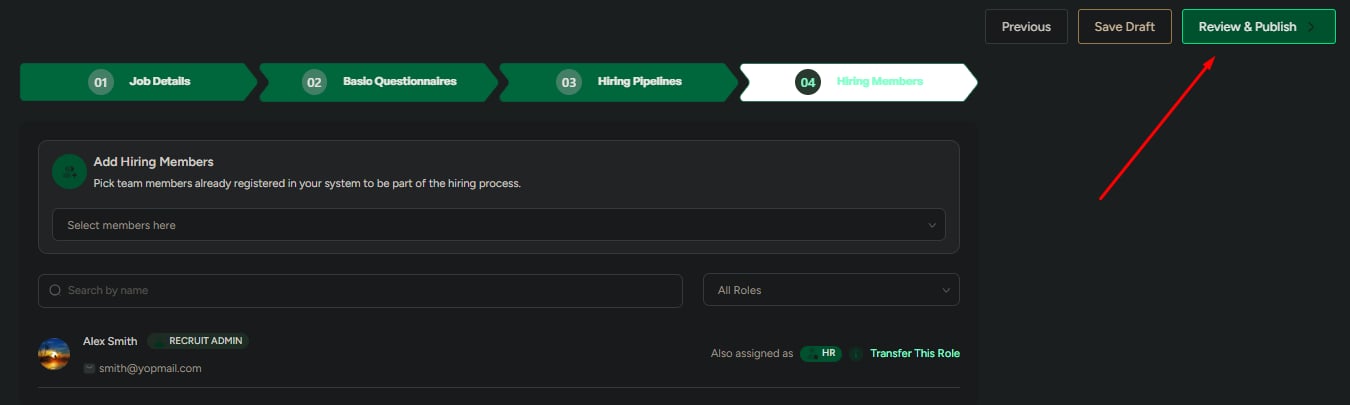
Add workspace members who will work on this requisition.
Click **Continue**.
Verify every detail before publishing.
When ready, click **Publish** and choose:
* **Visibility** — Global (anyone can apply) or Confidential (restricted)
* **Timing** — Immediate or Scheduled
Then click **Publish Job**.
 Adding a **salary range** can improve applicant quality. Even a broad range is usually more useful to candidates than no range.
## Method 2 — Generate with AI
Use this when speed matters or when you need help turning a rough role idea into a usable draft.
Describe the role, responsibilities, expectations, and ideal candidate in plain language. The more specific you are, the better the output.
Adding a **salary range** can improve applicant quality. Even a broad range is usually more useful to candidates than no range.
## Method 2 — Generate with AI
Use this when speed matters or when you need help turning a rough role idea into a usable draft.
Describe the role, responsibilities, expectations, and ideal candidate in plain language. The more specific you are, the better the output.
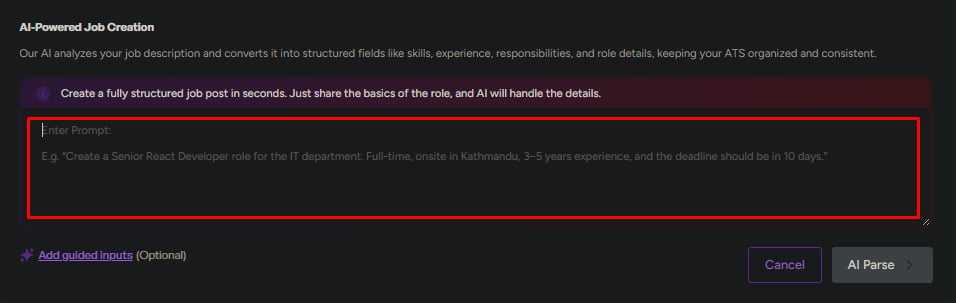 Add optional details to improve the generated draft:
* Company details
* Required skills
* Job benefits
Generate the job content, then review and edit every generated field before continuing.
Finish the same remaining steps as the manual flow:
**Questionnaire → Hiring pipeline → Hiring members → Review and publish**
Add optional details to improve the generated draft:
* Company details
* Required skills
* Job benefits
Generate the job content, then review and edit every generated field before continuing.
Finish the same remaining steps as the manual flow:
**Questionnaire → Hiring pipeline → Hiring members → Review and publish**
 Do not publish AI-generated content without reviewing it for accuracy, tone, completeness, and bias.
## Choose the right method
Best when:
* You have an existing job description ready to paste
* The role is highly specialized
* You need exact wording, compliance language, or internal approval text
Best when:
* You’re posting a high volume of similar roles
* You need a fast first draft to iterate on
* You’re writing for a department you don’t know deeply
## What to review before publishing
Before publishing, confirm:
* Job title and number of openings are correct
* Department, location, and work type are accurate
* Job description matches the role requirements
* Questionnaire questions are relevant
* Pipeline stages match your hiring process
* Hiring members are assigned correctly
* Visibility and publish timing are correct
If anything is unclear, save the job as a draft and review it with the hiring team before publishing.
## Related
Find, filter, and switch views across all your jobs.
Track candidates and pipeline progress for a specific job.
Do not publish AI-generated content without reviewing it for accuracy, tone, completeness, and bias.
## Choose the right method
Best when:
* You have an existing job description ready to paste
* The role is highly specialized
* You need exact wording, compliance language, or internal approval text
Best when:
* You’re posting a high volume of similar roles
* You need a fast first draft to iterate on
* You’re writing for a department you don’t know deeply
## What to review before publishing
Before publishing, confirm:
* Job title and number of openings are correct
* Department, location, and work type are accurate
* Job description matches the role requirements
* Questionnaire questions are relevant
* Pipeline stages match your hiring process
* Hiring members are assigned correctly
* Visibility and publish timing are correct
If anything is unclear, save the job as a draft and review it with the hiring team before publishing.
## Related
Find, filter, and switch views across all your jobs.
Track candidates and pipeline progress for a specific job.